
Getting back into the Z Car scene and some floor rust repairs.
I would like to introduce you to a new member of our club, or should I say an old new member.
Dan Guy has just recently rejoined the Z Club of NZ. He has a very interesting story which I think makes good reading. I also carried out some floor rust repairs which I have detailed and hope you find interesting as well.
I met Dan through Stuart Horne from your committee. Dan had just purchased a Datsun 240Z and needed some rust work done to the floor and rails which I will cover after Dan’s introduction.
History up to today:
 Dan first Joined the club in 1983. He had just bought a Datsun 240Z that had been imported from Australia. The car was first registered in NZ in 1971, but after some checking through the Z Club guru Dave Turner, it turned out that it was actually a 1969 car. This meant it had to be one of the first cars to be sold in Australia and, right now, if he still had it, extremely desirable. Dan used the car regularly, participating in Trials, Cruises, Motorkanas, Gymkhanas, and Concourse events. He had the car until 1989, and fully restored it during this time. Some considered it to have too much bling, however he was only 20 at the time, and he made the car look the way he liked it.
Dan always wanted to go racing, so he sold the Datsun and built his own Sports car, which raced extensively around the country. He had a 280ZX at the time, which was used for towing the race car.
After he got married to Jules, and had two boys, the cars went on the back burner. But in 2018 his interest perked up again, and with his boys, he got into restoring and racing vintage Go Karts, which he continues to do currently. Recently he built 2 Grass karts.
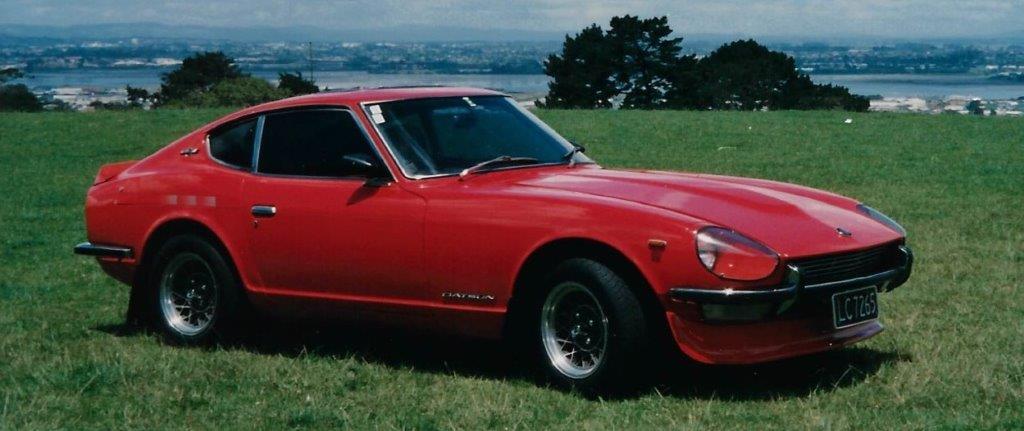
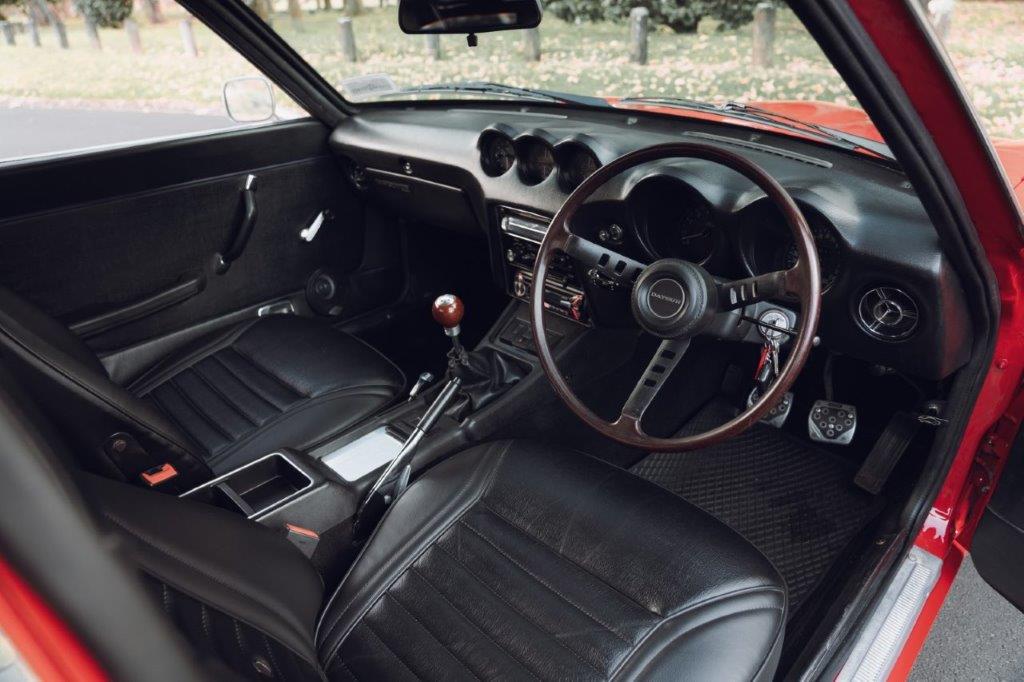
However, the Datsun Z bug was always there and a couple of years ago he started looking around for another. In late 2023 he found one which he bought at auction. This particular car was first registered in Toowoomba Australia. The car had received quite some work over the years, as they do. The 2.4 litre engine was changed for a fuel injected 2.8 L28. It was later converted back to a L24, and the car had a recent repaint and tidied up. It had new seat covers and a carpet set when I saw it. Dan says they were Imported from the States, the rest was still all original. The car looked very tidy and well presented.
When the car went for its WOF there were a few things that needed tackling, the worst of which was the rust in the chassis rails below the front seats. Upon investigation it was discovered that the rust had previously been crudely patched and undersealed. He has a new Urethane suspension bush kit to fit, has had a new handbrake cable made, has upgraded headlights, and better sound proofing to install before he refits the carpets.
His aim at this point is to do the few tidy ups and drive and enjoy the car.
When Dan discovered the rust his first thought was to approach a panel beater to repair it. He was advised that if he got the new rails, the panel beater would weld them in. Well that posed a problem. As the rails were only available in the States and came complete with the floor, which at the time he thought he didn’t need. At this point Dan contacted Stuart Horne, a longtime friend who he knew through the club and also through his karts. Stuart posed the question to me, asking what the best way to tackle this was.
Rust repairs:
That is how I became involved. My answer was, “well just make new ones”, easy! I think the modern panel beater has lost this art and also rarely has the opportunity, or the tools to do this sort of work anymore. I mentioned to Stuart that I would happily make some rails for Dan. At that stage Dan made contact with me and asked if I could do the work for him.
I thought it would be interesting for you to see exactly what was done and how it was done. This is the sort of work that I really enjoy doing. The formula that I always go by when talking to people about rust, irrespective of how visible it is, is to say that you only see 1/3 of what is actually there. This is to help people understand what will likely be involved. I don’t think Dan realized at the time how bad the rust actually was.
So, what started out to be “making a section of rail and welding into place” turned into replacing the front floor, sections of chassis rails, and a little bit of the bulkhead. Below is the procedure I followed, and pictures.
- The first part was to inspect all the rusted section. I found that the floor actually had quite a bit of surface rust, but once I started grinding off the rust, I discovered that in places the rust was on the verge of going right through the floor. When I attacked it, I was left with holes in the floor. This left no option but to look at replacing not only the rails, but also the floors.


2. I first cut out the floor section and cut off the end of the rails. I also had to remove a bit of the front bulkhead where the bulkhead joined the floor in the foot well. I then cleaned up the inside of the rail that was visible and rust treated and painted it. I also removed the seat cross member cleanly, so once completed It could be welded back into place.


3. Then I proceeded to make a new floor section. To do this I was able to fold the edge that welds to the inner sill, and also make a couple of folds for the raised curve through the middle of the floor. Once I had these two folds in place, I simply screwed two blocks down to my bench and with a round dowel I gently hammered the curved shape between the folds. There was a small section that was flat under the seat brace which I hot shrunk back down. I had a wooden template for the shape of the floor from the inner sill. You will notice that I ruled a series of lines on the new floor to ensure that when I created the curve, I got the shape nice and even. I made the curve by doing a series of very small folds. The next bit to tackle was the oval swaged recess, I don’t have a swaging machine, so this was done by hand. I had a wooden template of the recess made from plywood about 5 mm thick. I screwed that down to my bench and then screwed the floor to the template in the correct position. After that it was a matter of hammering the floor panel down over the template. The last bit was to make the recess part on the sill side of the floor just in front of the seats. To do that I Just cut a hole and hammered up a recess and welded it into place. Floor done.
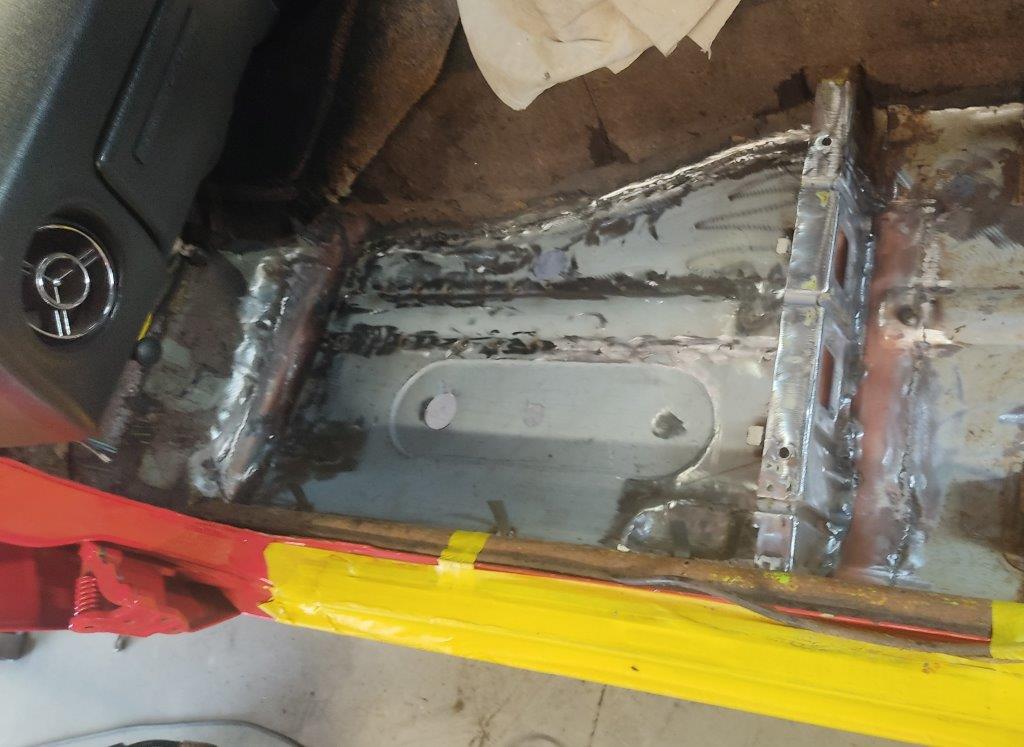
4. I made new sections for the end of the rails, just a series of folds, and closed off the ends and welded this onto the ends of the rails. I always try to paint the inside of the sections I replace wherever possible. I made small sections for the bulkheads and welded them into place. The floor was spot welded from the top to the rail through holes I drilled, as was the floor to the inner sill. The rest was butt welded into the floor and the tunnel. The gold paint you see is actually a weld through primer. This gives the joint a coating of rust prevention between the welds. The repairs were then painted with etch primer which is zinc based.


This I just brushed on, seeing as it would all be covered. I finished over this with a little filler both on top and under the car to make the welds less noticeable. This was then primed, and over this a top coat of rattle- can grey to I used a stone chip rattle can, to finish the underside. It was then just a matter of refitting the doors (which I had removed to make the repair more accessible), the console and reglue the side carpets. The last bit was to drill a hole on the underside of the rail so I could put some rust prevention wax inside the rails. There was also quite a bit of jacking damage to the front rails. These were hammered out when the floor was out. but there was a sizable dent on the forward part of the right chassis rail which was not repairable. I cut the damaged section out, hammered it back into shape and welded it back into place. Rust proofed inside the rails and…….
Job done.
Below are some pics of Dan’s first car.


Bernie Kant
President Z Club of NZ
![]()
